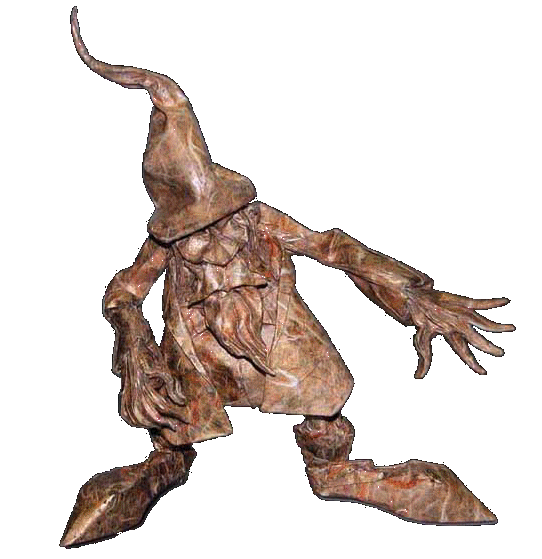
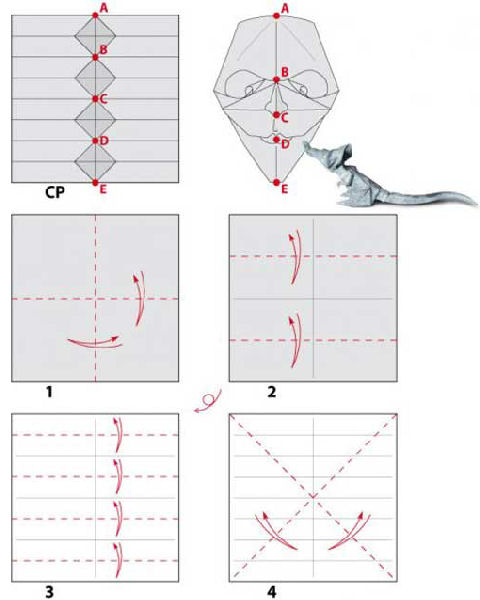
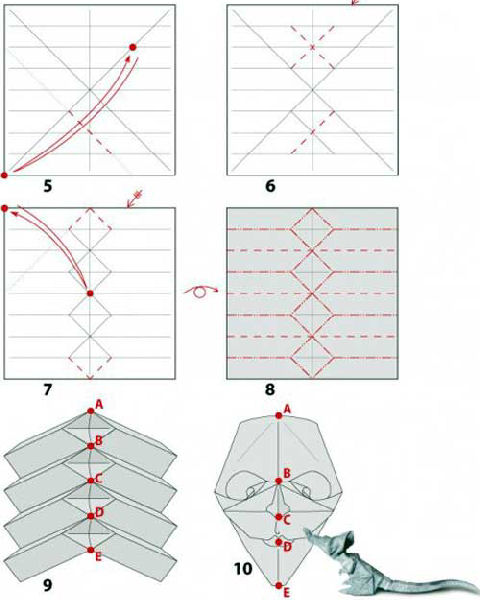
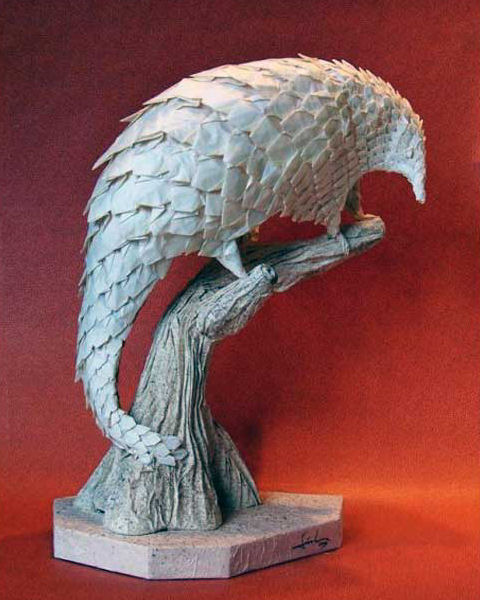
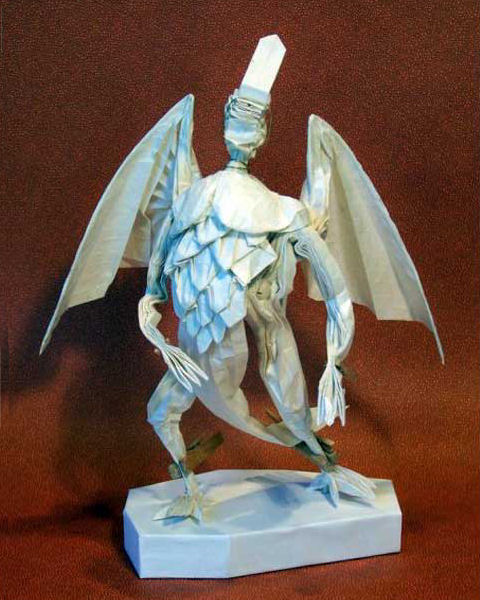
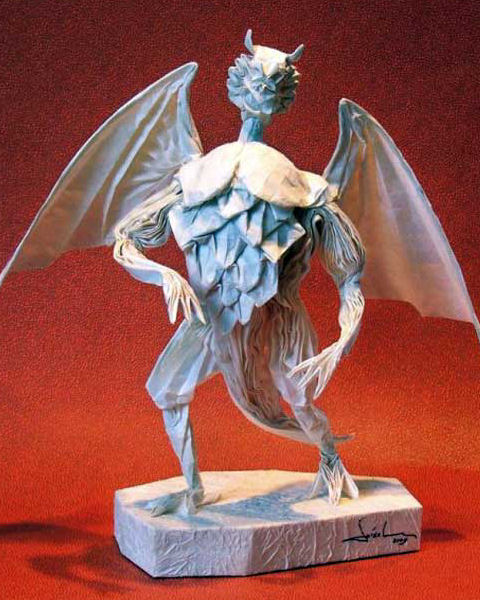
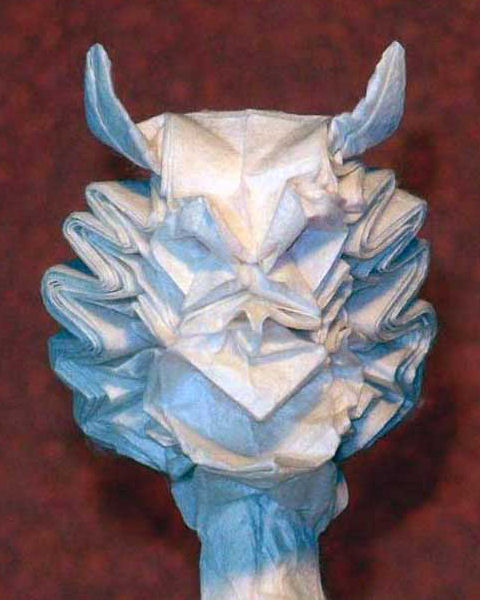
Eric Joisel : Balrogs
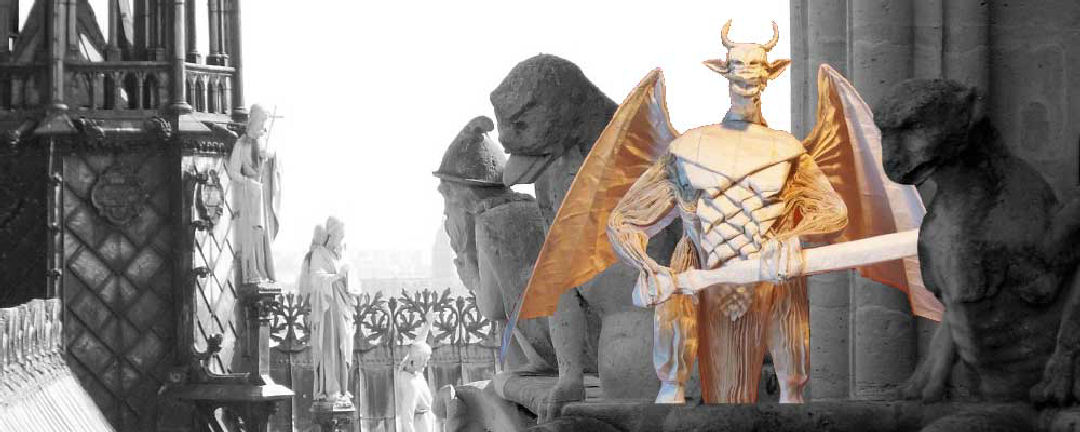
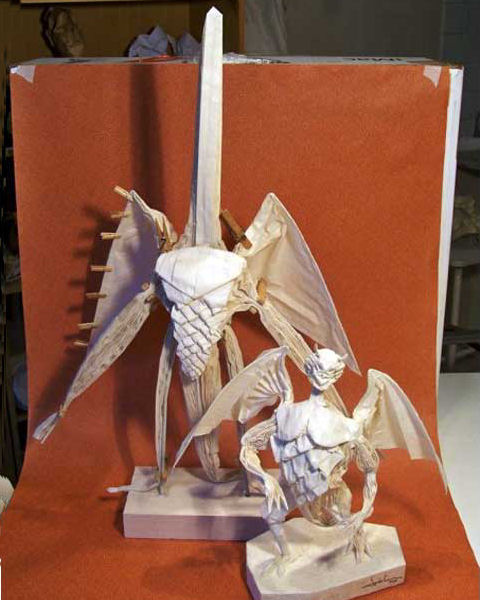
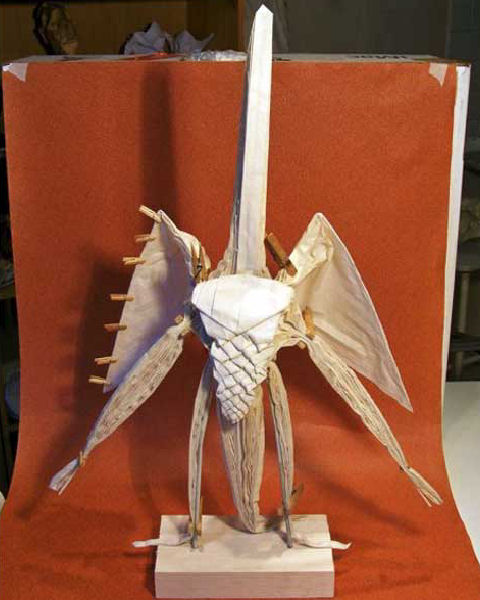
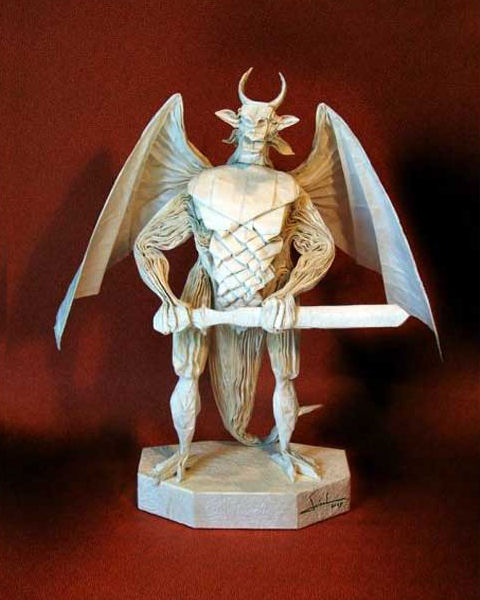
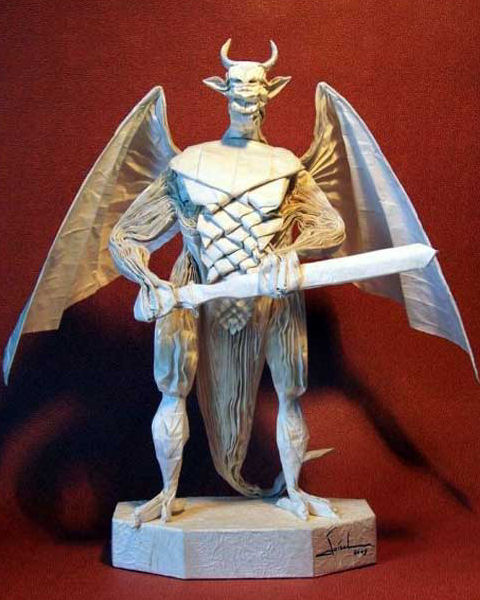
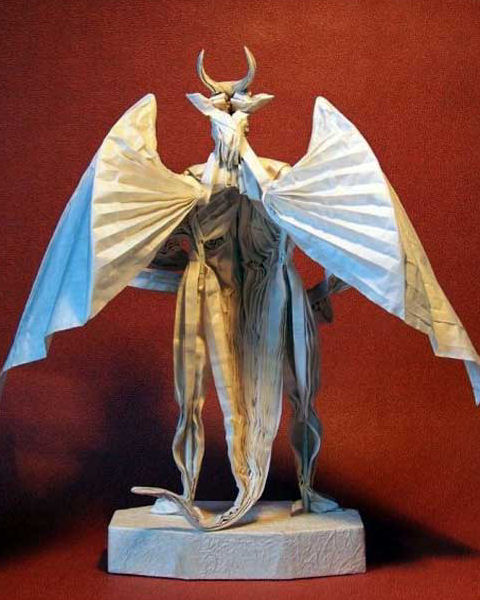
Gargoyle or Balrog?

“Here is the result of searches I made on Google:

In architecture, a gargoyle is a carved stone grotesque with a spout designed to convey water from a roof and away from the side of a building. The were a favorite architectural element of 13th-15th Century French cathedrals and often part of the gutters. Gargoyles are usually an elongated fantastic animal because the length of the gargoyle determines how far water is thrown from the wall.
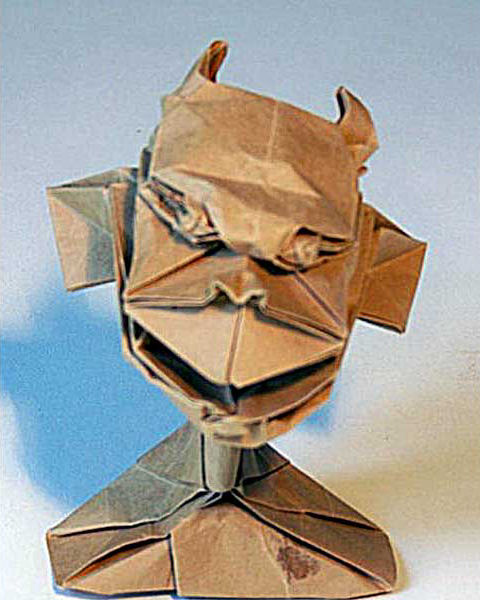
Gargoyles
The term originates from the French gargouille, originally ‘throat’ or ‘gullet’. It is also connected to the French verb gargariser, which means ‘to gargle’. The Dutch word for gargoyle is waterspuwer, which means ‘water spitter’ or “water vomiter.”

Gargoyles are said to scare off and protect from any evil or harmful spirits.

A Balrog is a fictional demonic creature from J.R.R.Tolkien’s Middle-earth fantasy writings and appears as an enemy of Gandalf in The Lord of the Rings. Such creatures first appeared in print in his novel ‘The Lord of the Rings’, though they figured in earlier writings that posthumously appeared in ‘The Silmarillion’ and other books.

Balrogs are described as tall, menacing humanoid beings, with the ability to shroud themselves in fire, darkness, and shadow. They frequently appeared armed with fiery whips ‘of many thongs’, and occasionally used long swords. In Tolkien’s later conception, they could not be casually destroyed; significant power was required. Only dragons rivalled their capacity for ferocity and destruction, and during the First Age of Middle-earth, they were among the most feared of Morgoth’s forces.

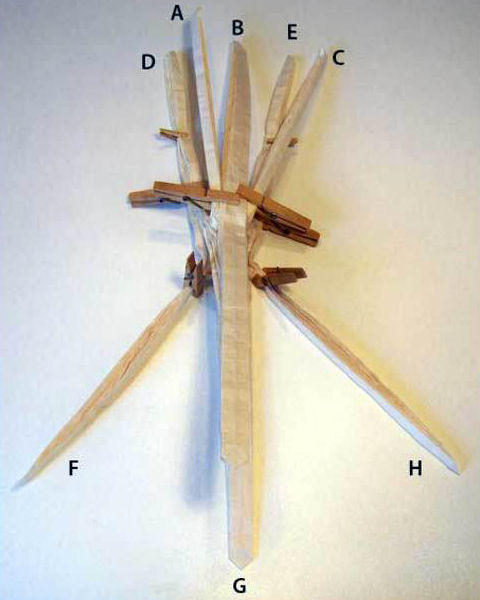
Watch the slideshow below to see a step-by-step demonstration of the creation of a balrog. Enjoy.”

First Try

This is a first try I did 2 or 3 years ago, thinking about a gargoyle. The very simple box-pleating system shown in the following two photos allow me to form ANY type of face (men, women or monsters).

Mask making

First part of mask diagram…

Mask making 2

Part 2 of the mask diagram.

In this example, the points A-B-C-D-E will give respectfully the different face details shown on the right. An open sink in point “B” will form the two eyes.

Added diamonds can represent horns, beard and so on…

Pangolin shapes

The pangolin is one of my most simple models (yes, yes) in terms of conception : fold 2 corners to the center of the square, then make many crossed pleats to form 3 or 400 shapes from different sizes. A & F become head & tail, B-C-D-E of course the 4 legs.

Then, put this sort of pangolin’s skin in 3D and… …I form a pangolin with pleats and crimps. The folds are not exact, just an idea, and are improvised every model, N°3 for this one. Every one is different, for the material N°1 kraft wet-folding – N°2 sandwich + acrylic – this one in bamboo/kozo 90 grams methyl cellulose and wet folding. The grid is also re-calculated, for example in N°3 the ‘return-back’ of every shape is bigger. This means more loose paper, but also more movement possible into the animal.

Pangolin complete

In the case of my pangolin N°1, the idea stayed quietly in my mind for 3 years. I had at this time no solutions for it. Then one morning, I said, “That’s it !” …and a week later, it was done.

N°3 is the one in the photo created from a 130-cm square.
Final size: height 50-cm; length 40-cm.

Working on texture is the most important idea in my ‘Barbarians’ series. Generally, there are 4 or 5 different textures in a character. I choose the white color to get the best light play on these different textures.

Crease pattern

Returning now to the balrog…

Here is the very quick drawing I made first.

•A & C; are the wings, B the head.
• DE will be the fingers. Their number will depend of the length of paper I have for the whole arm.
• F & H; will be the feet and G the tail.

To those who ask me for a Barbarian CP: you can see in this example how basic and dirty it can be. In fact, I change many details just as I start the precreases! And this collapse will NOT give a balrog, as you can see later…

For this model, I decided to start directly with my bamboo/kozo paper, without any first try.

Collapse

The letters are the same than in the previous picture.

Alive

Something ‘alive’ is starting to form.

In my first idea, I expected many tiny shapes into the body. Alas, the thickness and big number of layers makes this very difficult. (the initial square is 106 cm, divided into 112 x 112 box-pleating grid.)

This is the part of the folding process I really love. The geometric part and collapse are just boring for me. Modelling the paper, as I did 10-years with clay in the past and having a real dialogue with the paper excites me a lot. During this time, many developments are possible. Very often, the paper will make more decisions than me, depending of the thickness, number of layers, etc… Improvisation is central to the ‘Barbarian concept’.

Modeling

With this thin paper and large square, it’s easier to work when the model is fixed on a metallic structure and a wooden base. Purists will probably be shocked. I can understand that, but personally, that’s not important: I do the origami I am happy with. In any case, some exhibits can run for a whole year so structure and base are both required.

The ratio here is relatively bad:

Final height = 35 cm for a 106-cm square, so about 1/3 instead of more than 1/2 for most barbarians. (also the wingspan is big!)

Completed

Balrog completed.

Head

I confess I could do better. I was a bit tired when I finished it. But that base interests me. I will probably use it again for different constructions.

Balrog 2

I was a bit disappointed by the first balrog. I think I can get better with the same beginning. I decide to make many differences:

• Enlarge the paper and the result. Paper is enlarged from 106 to 136-cm (with two pieces glued together, my paper normally is 140 x 110-cm.) The box-pleating grid moves up from 112 x 112 to 136 x 136-cm.

• I’ll also change the central shaping system, so that I can make a lot of small shapes.

Folding process

Then I had a third idea for making the back abdomen. Here, however, the arms look definitively too long, but…

Completed

I am satisfied with this result, a very rare occurrence. That is relatively normal with a ‘first try’. Folding the second right after the first is very rewarding.

• the second balrog is bigger than the first (height = 45-cm, instead of 35), length = 40-cm.
• The central shapes are much better.
• The sword effect is great.

I could continue to work on it and resolve many little details, but something important in origami is to realize when to stop. In fact, a more perfect result generally looks dead. In terms of ‘wet-folding’, most of the folding process is done dry. I wet only local parts during the final shaping to sculpt it, and use a hair-dryer – ouch! my poor fingers! it’s hot!

Final head

Finished head.

Corrections

A few corrections and now finished.

Back view

View from behind.

“There is a lot about life that Eric has taught me. First, Eric says ‘I must suffer’. I respond, ‘I can’t imagine suffering on your scale!’ It is not just the number of folds, it is the execution in the tradition of great sculptors like Rodin, or Bernini, that decades of practice would reward only a few. ‘The most important hand is your support hand’, Eric continues. ‘What?’ I still need help with this one, but it makes intuitive sense for everything I do. ‘Then you do like this, and this…’, and Eric has lost me until he laughs. A Joisel laugh can evaporate all suffering. For me it is such a gift.”
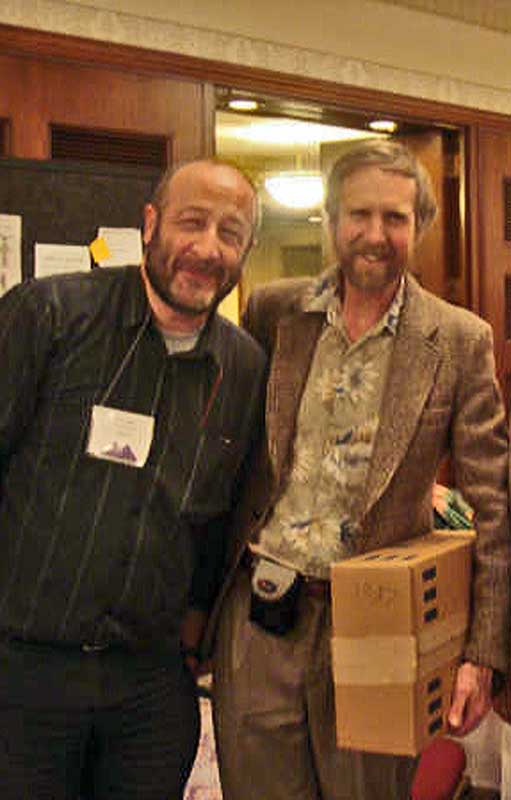
Bernie Peyton